How I Deployed Proxmox at Home and Secured It with Cloudflare Tunneling & MFA
I set up Proxmox on my home server and secured remote access using Cloudflare Tunnel to avoid exposing my network. To enhance security, I implemented application-layer MFA via email authentication, ensuring only authorized users can access the Proxmox Web UI. This setup provides a secure and efficient way to manage virtual machines remotely.


Introduction
I recently set up Proxmox, a powerful open-source virtualization platform, on my home server. While setting it up was straightforward, I wanted secure remote access without exposing my network to unnecessary risks. To achieve this, I used Cloudflare Tunnels to securely connect to my Proxmox server over the internet and implemented application-layer MFA (Multi-Factor Authentication) using my email for an added layer of security. In this blog, I’ll walk through my deployment process, how I configured secure remote access, and the steps I took to enhance security.
Setting Up Proxmox at Home
To get started, I installed Proxmox on a dedicated machine. Here’s a quick overview of my setup process:
- Installing Proxmox
- Downloaded the latest Proxmox VE ISO from the official website.
- Created a bootable USB using Rufus.
- Installed Proxmox on my home server, selecting the primary disk for the installation.
- Configured networking and set a static IP address for easier remote access.
- Basic Configuration After Installation
- Accessed the Proxmox Web UI via
https://<local-ip>:8006. - Updated the system (
apt update && apt full-upgrade -y). - Removed the enterprise repository (as I am using the free version) and enabled the no-subscription repository.
- Accessed the Proxmox Web UI via
Configuring Secure Online Access with Cloudflare Tunnels
Since I wanted to access Proxmox remotely without exposing my home IP, I used Cloudflare Tunnel. Here’s how I set it up:
1. Setting Up Cloudflare Tunnel
- Signed up for a Cloudflare account and added my domain.
- Installed
cloudflaredon my Proxmox server. - Created a new Cloudflare Tunnel:
- Navigate to Cloudflare Dashboard → Zero Trust → Access → Tunnels.
- Click Create a Tunnel, give it a name, and download the connector.
- Run the provided installation command on your Proxmox server to connect it.
- Assign a subdomain (
proxmox.mydomain.com) to the tunnel and configure traffic routing.

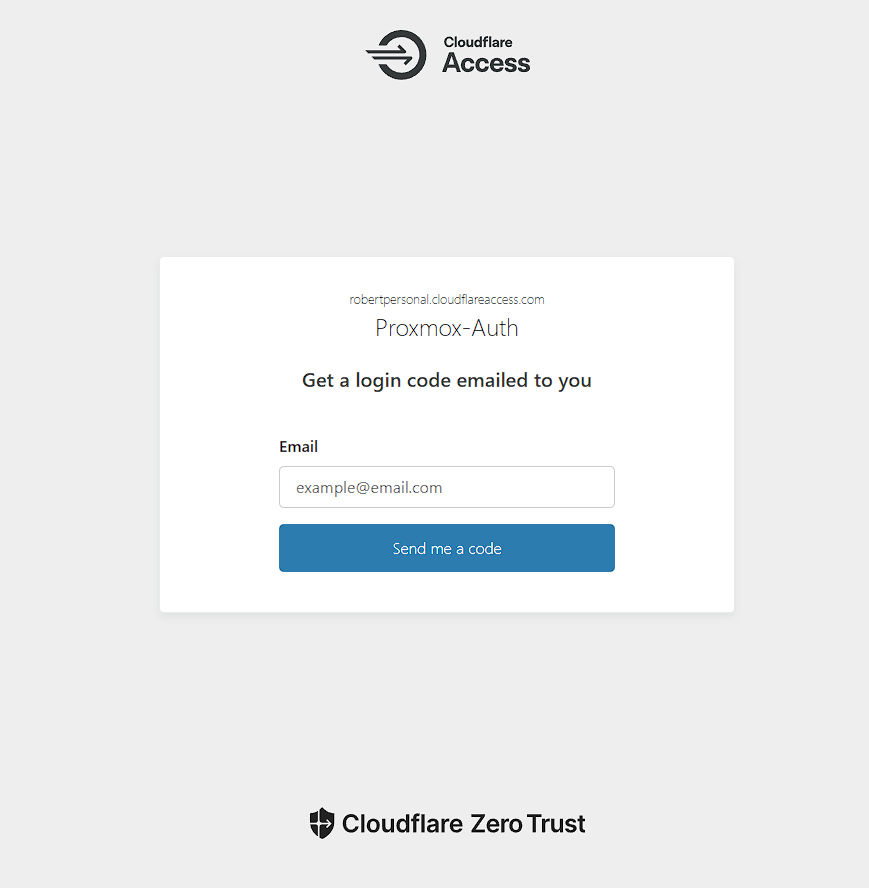
2. Enabling Secure Access Controls
- In the Cloudflare dashboard, go to Zero Trust → Access → Applications.
- Click Create an Application, select Self-Hosted, and enter the Proxmox subdomain.
- Under Policies, configure authentication settings (e.g., email-based MFA).
- Enable TLS encryption to ensure secure connections.
Enhancing Security with Application Layer MFA
To further secure my setup, I implemented Cloudflare Access MFA, requiring an email-based authentication step before users could reach my Proxmox server:
1. Configuring MFA via Email Authentication
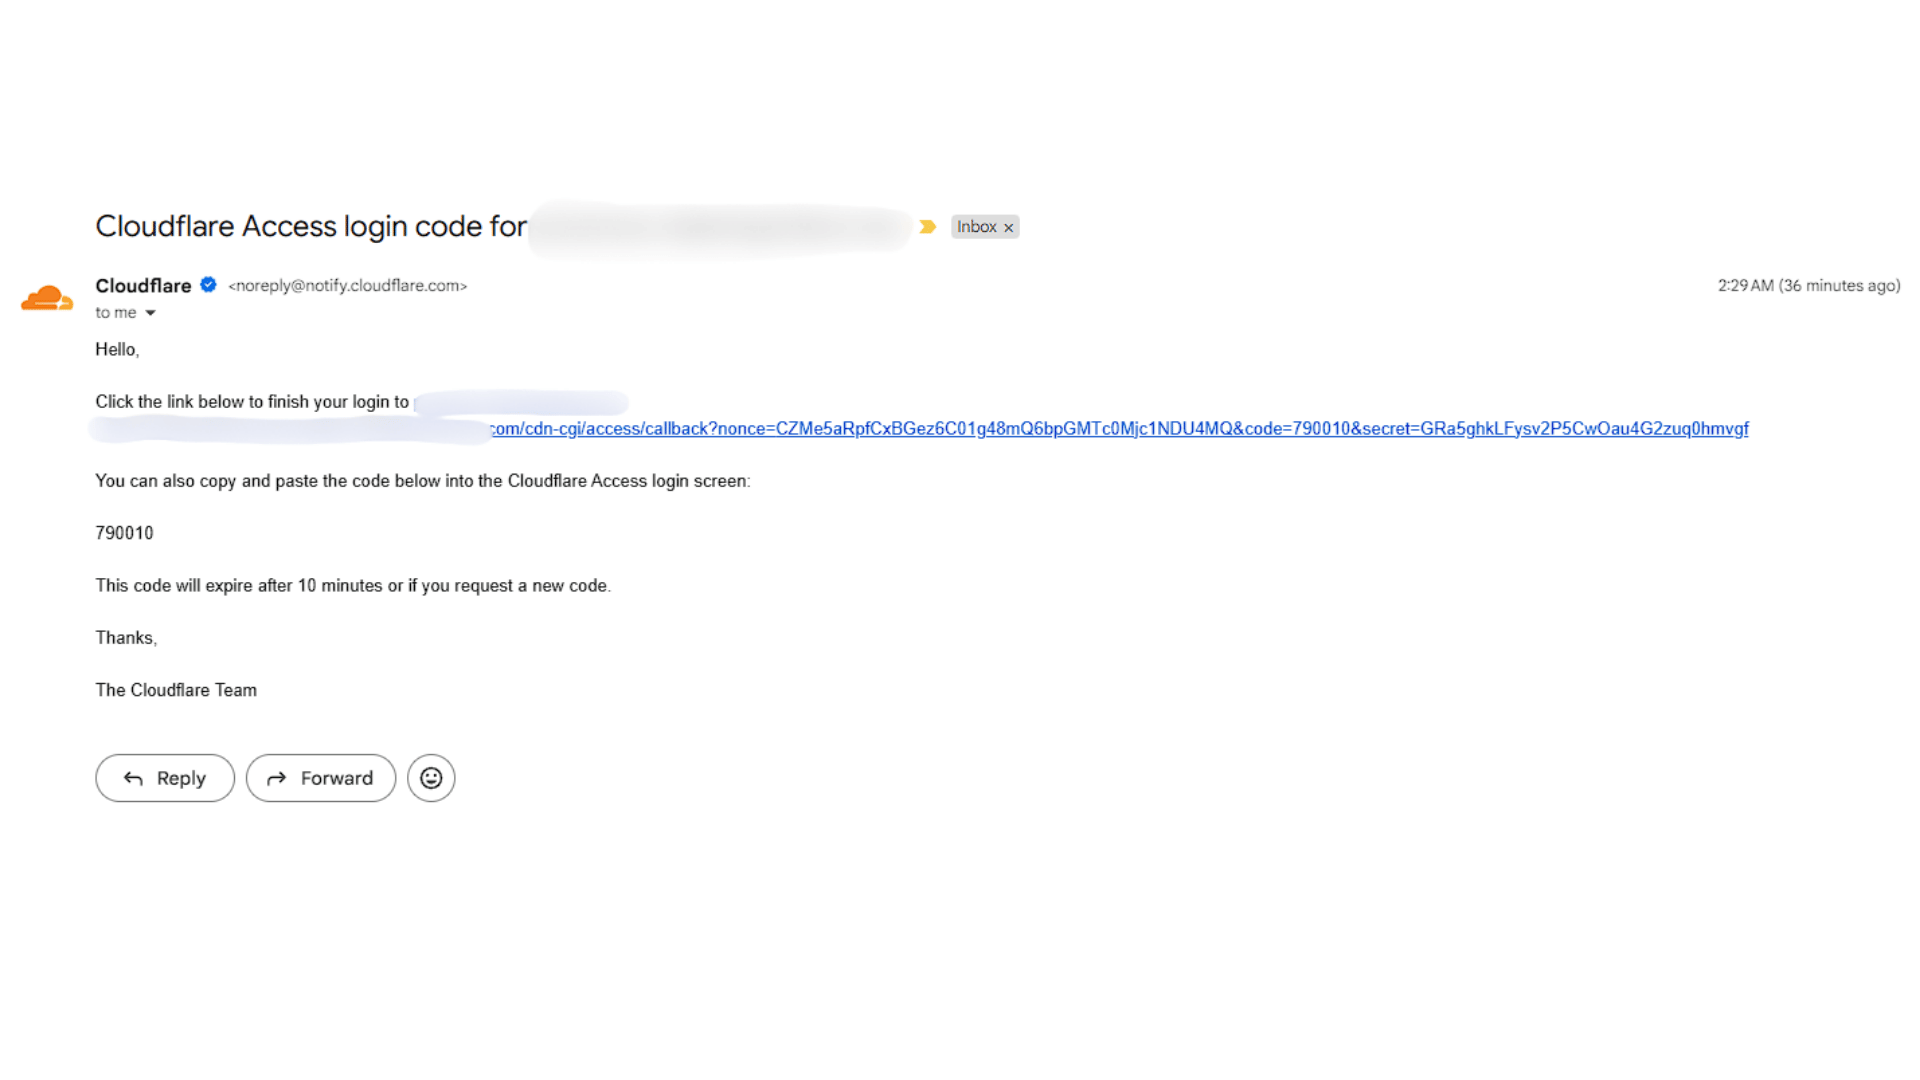
- In Cloudflare Zero Trust, navigate to Access → Authentication.
- Create a rule that requires email-based One-Time Passcodes (OTP).
- Whitelist specific email addresses allowed to access Proxmox.
- Save and apply the policy to ensure only authorized users can connect.
2. Testing the Security Setup
- Attempted access from different devices to ensure only authorized users could connect.
- Verified that Proxmox Web UI was now secured with an MFA challenge before login.
Lessons Learned
TipCloudflare Tunnel is a great alternative to exposing ports: It provides a secure, encrypted way to access home-hosted services without opening firewall ports.
TipApplication-layer security is critical: Even if someone discovers my subdomain, they still need to pass Cloudflare’s email-based MFA before reaching the Proxmox login screen.
TipProxmox is powerful but requires careful configuration: Especially when securing remote access, taking additional steps like MFA makes a big difference in security.
Conclusion
By combining Proxmox, Cloudflare Tunnel, and email-based MFA, I successfully deployed a secure, remote-accessible home server. This setup ensures I can manage my virtual machines from anywhere while maintaining strong security controls. If you’re looking for a secure way to expose your home lab online, I highly recommend trying this approach!